Warning: this is going to be a long one :)
On July 24th, 2010 we celebrated our sweet little Anna Claire's 1st birthday!
The theme was "Pink Lemonade". Why? Because that's what I craved pretty much the entire pregnancy. I couldn't seem to get enough which is weird because I'm not really a fan of lemon or citrus flavored stuff, but whatever it was that started me on the kick.... I couldn't stop!
So that was the inspiration... that and the fact that a light melon pink and yellow would look totally cute together! :)
Here are some pictures from her "invitation photo shoot". I call them the "outtakes" - there were some pretty cute ones that were hard to decide between, but these were the ones that just made me giggle.


(this was her first taste of lemon... she actually liked it after this)

When we say "Anna can you shrug?" this is what we get. I have NO CLUE how she learned what the word 'shrug' meant - but she picked up on it and it's a pretty cute party trick ;)


...this was the final choice for the invite.

... and this was the actual invite. It was tri folded wrapped with a paper lemon slice and ribbon.


The poem reads:
Months one and two I laughed and smiled, month three I learned to reachMonth four I rolled from back to front, by five discovered speech.And in month six I learned to sit, then clapped and signed in sevenMonth eight my sweet great grandmother was called by God to Heaven.Month nine I learned to say bye bye and wave my little handsMonth ten I crawled and stood and cruised and added words again!Then at eleven months of age I’ve learned to stand aloneMy dad and mom are very proud of how much I have grown.Who knows what ‘party tricks’ I’ll learn before month twelve is hereBut I hope you will join me to celebrate my year!And now the day of the party! A few of the elements:


(this was her "coming home outfit". It was so tiny!!)


I took a cake decorating class the month of her party and made her smash cake myself!! My sister helped make the lemons on top out of fondant... wish I could claim them however I did supervise and help make the lemon half ;)


The mantle:


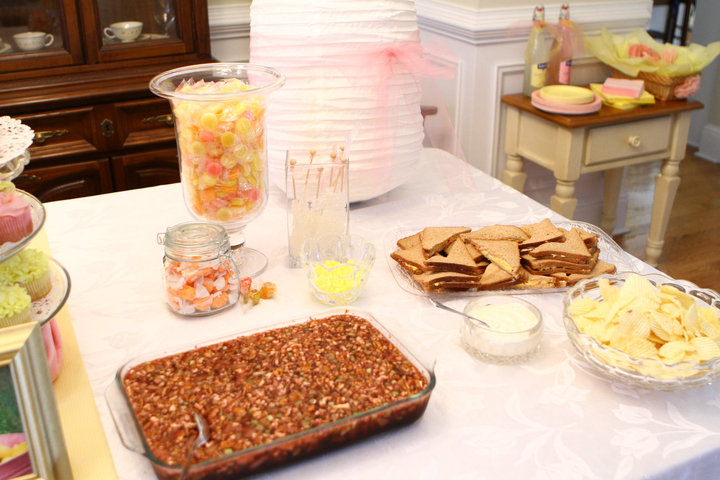
The food table:


The goodie bags:


The lemonade/beverage station (and yes, I drove 1hr to get Newman's Own lemonade because it won some lemonade award...) with fresh fruit for anyone wanting to add a little punch to their drinks :)
The lemons were to write your name on to identify your drink.


And my favorite part... the lemonade stand. I made this just for Anna - perfect for her height :)
Edit - I've had so many comments on the lemonade stand - I have to confess - Yes, I did make it myself - but I got the idea from google images... actually a few images had the crate idea, but one in particular was the main inspiration - just can't find the image again to track that person down to give them props. Whoever you are - your crate stand was a hit :)


I forgot to take photos of the other sign out front and the mailbox... oh well. (edit - Mom went outside and took one for me... the balloons are missing from it because they had fallen, but you get the idea. It was outside at the driveway) The mailbox just had a pom pom on it. I'll let you use your imagination :)

Oh yeah - And I guess I better show the birthday girl :) She wasn't a huge fan of the party hat I made her - but she forgot about it when we started singing 'Happy Birthday' to her (twice since I wasn't recording the first time). But as soon as we stopped - the hat had to go!


A few pics of her and her lemonade stand.... if I were you I probably wouldn't drink the lemonade ;)


And a pic from her "After Party Photo Shoot". She was workin the lemon juicer!! So funny!!! I have a lot more - but they are on Caron's camera so I have to wait for those.

I think overall it turned out pretty cute. There were still a few things I didn't have time to do, but I'll just have to save them for her 2nd birthday :)
Aaaaannnnd finally - I couldn't let my little princess celebrate her day without true celebrity status - so I submitted her pic to Fox 5. This is a shot of her 1st tv appearance (minus all the media exposure she got while in the belly... hmm guess I should blog about that)

Happy Birthday to my sweet Bean. We love you more than we can ever express. You have truly brought so much joy and happiness to our lives and we will forever be better people because of you.
Forgot to give props to my
sis for taking pics of the party setup and during the party, my
mom and dad for helping clean, organize and setup. You're the bestest!


